
Floriculture Sector Biosecurity Guide
March 31, 2017
Glossary
The following terms are used in this Guide. In the section in which each term is most relevant, the term is linked to its definition in this glossary.
Biological control:
- Often referred to as "biocontrol". Biological pest control is the method of controlling pests (including insects, mites, weeds and plant diseases) using other living organisms. It relies on predation, parasitism, herbivory, or other natural mechanisms, but typically also involves an active human management role. It is often an important component of Integrated Pest Management (IPM) programs.
Biosecurity:
- A set of practices used to prevent, minimize and manage the transmission of pests, including their introduction, spread and release.
Controlled Access Zone (CAZ):
- A floriculture facility or area within a floriculture facility where access is restricted or otherwise controlled.
Cover crop:
- Crop planted primarily for purposes such as reducing soil erosion, adding organic matter, reducing nutrient losses, improving soil fertility, reducing pest populations, reducing compaction and improving soil structure.
Greenhouse:
- A floriculture greenhouse is the physical location where plants are grown within, under, or sheltered by structures to provide a modified growing condition and/or protection from pests and adverse weather. These structures may include greenhouses, hoop houses, screen houses, shade houses, or other structuresFootnote 1.
High-risk area:
- An area that requires additional biosecurity measures.
Input:
- The resources that are used in floriculture production, such as chemicals, equipment, fertilizer, seed and plant material.
Integrated Pest Management (IPM):
- Integrated Pest Management (IPM) is a process for planning and managing sites to prevent pest problems and for making decisions about when and how to intervene when pest problems occur. It is a sustainable approach, combining biological, cultural, physical, and chemical tools to manage pests so that the benefits of pest control are maximized and the health and environmental risks are minimized.
Maintenance:
- Involves unscheduled and routinely scheduled activities to fix any area of the floriculture facility, device or equipment should it become (or to prevent it from becoming) out of order or broken.
Output:
- Includes waste, garbage and finished product.
PestFootnote 2:
- Any living organism injurious to plants, plant products or by-products which includes insects, diseases and weeds.
Restricted Access Zone (RAZ):
- An area, generally located inside the controlled access zone, where access by people or equipment is further restricted, providing an extra level of protection.
Service providers:
- Includes but is not limited to federal and provincial inspectors, delivery personnel, utility providers such as electricians and plumbers, Integrated Pest Management specialists and extension specialists.
Supplier:
- Any individual or business that provides inputs for use in a floriculture facility.
Vector:
- A biological, physical or environmental agent that disperses a plant pest.
Visitors:
- In this document, the term "visitors" includes any people other than employees who enter a facility, such as suppliers, service providers and customers.
Preface
This Floriculture Sector Biosecurity Guide (the Guide) has been developed as a supporting document for the National Voluntary Farm-Level Biosecurity Standard for the Greenhouse, Nursery and Floriculture Sectors (the Standard) to assist floriculture producers ("producers" in the rest of this document) with the development of a biosecurity plan for their floriculture facilities ("facilities"). The Standard contains general biosecurity practices and measures of relevance to all three sectors while this Guide provides guidance tailored to the floriculture sector.
Note: This Guide uses the term "floriculture facility" instead of "place of production" as used in the Standard.
This voluntary Guide provides sector-specific biosecurity practices and measures for the consideration of producers to help achieve the goals of the Standard. It is recognized that facilities will differ from one another and the recommendations in this Guide will not be universally applicable.
This Guide was developed collaboratively between representatives from industry, education and government. Please see Appendix 6 for acknowledgements.
The information and guidance provided in this Guide is applicable to both established and new places of production. The considerations outlined in the Guide are based on scientifically sound principles that are intended to reduce the risk of pest introduction, enhance pest management within a facility and mitigate the spread of injurious pests to additional facilities.
How to Use This Guide
i) Organization of This Guide
This Guide has been organized into the following sections:
- Education, Training and Communication
- Location and Layout
- High-Risk Areas
- Movement of People, Equipment and Vehicles
- Maintenance
- Production Inputs
- Plant Health
- Integrated Pest Management
- Production Outputs
Each of these sections is divided into six parts:
- Target outcome: Goals that all producers should try to achieve to protect their facilities from the introduction and spread of pests. These are taken from the Standard.
- Benefits: A brief statement of the value of the target outcome to the producer.
- Risks: An explanation of why the specific target outcome is important to biosecurity and of the biosecurity risks related to the section topic.
- Guidelines: Guidance and biosecurity measures to consider to help minimize pest risk. The intent of the biosecurity measures is not to prescribe but to provide guidance. The biosecurity measures are based on an understanding of pest risk pathways, science and management practices and are intended to be attainable and practical.
- Questions: Questions are provided to prompt producers to assess the biosecurity measures that are in place at their facility and consider additional biosecurity measures that could be implemented.
- Self-assessment checklists: A summary of the information from the "Guidelines" sub-section, presented in a checklist format, to help producers conduct a self-assessment of the completeness and effectiveness of the biosecurity measures in place at their facility.
Appendices provide additional information resources and examples of tools that can be used to implement biosecurity measures in a facility, such as signs.
ii) How to Complete the Self-Assessment Checklists
The self-assessment checklists have been provided to assist producers in assessing whether additional biosecurity measures can be implemented in their facility. There are four columns included in the checklist to indicate whether a biosecurity measure is currently implemented (Yes), if it is sometimes implemented (Sometimes), if it is not implemented (No) or if it is not applicable to the facility (Not applicable).
iii) Self-Assessment Checklist and Action Work Plan PDF Document
The Floriculture Sector Biosecurity Guide Self-Assessment Checklist and Action Work Plan repeats the checklists from the Guide in an interactive format. This tool also includes a work plan where actions to implement additional biosecurity measures within a facility can be recorded. When the tool is completed electronically, the biosecurity measures for which "No" and "Sometimes" are chosen are automatically transferred to the action work plan.
This tool can be downloaded from the forms catalogue on the Canadian Food Inspection Agency's website. In the "Filter items" search field, type "5801" to obtain the form.
1.0 Introduction
1.1 The Importance of Biosecurity
Biosecurity is a set of practices used to prevent, minimize and manage the transmission of pests, including their introduction, spread and release. Implementing and enhancing biosecurity practices within a facility helps protect individual and sector-wide economic interests. Producers can benefit from increasing their awareness of biosecurity risks and of the measures that can be implemented at their facilities to minimize the risk of pest introduction and spread.
Due to the intensive nature of production, limited genetic diversity within crops and frequency of facility-to-facility movement, threats to the biosecurity of a facility may develop rapidly and spread to other facilities with surprising ease. Implementing sound biosecurity practices within a facility can help mitigate many pest risks through reduced incidences of pest introduction, more effective management of pest problems and prevention of pest spread to other facilities.
1.2 Biosecurity Concepts
Implementing biosecurity measures can be effective not only for mitigating the spread of pests but also for preventing the introduction of new and unknown pest risks. Applying biosecurity measures depends on an analysis of the risks and pathways of pest transmission for a facility. Knowledge of pests and their pathways of transmission is important when developing a biosecurity plan. With this knowledge, pest vectors can be managed and biosecurity measures can be applied to interrupt pest pathways of transmission, reducing crop damage and minimizing economic losses. Examples of pathways of pest transmission can include insects, employees, equipment and wind.
To determine the critical points in pest pathways of transmission where biosecurity measures may be applied, a risk assessment may be conducted. The risks to a facility will vary depending on several factors such as the type of crop grown, source(s) of propagative material, region, climate and production practices.
As illustrated in Figure 1, pest outbreaks do not happen in isolation but are dependent on the interrelated nature of the crop, the environment and the pest.
- Crops: Without a susceptible crop, there is a lower risk of pest infestation.
- Pests: Keep pests from entering the production area.
- Environment: Certain environmental conditions can be more or less favorable to the development of pests.
Pest risks may be mitigated by applying biosecurity measures to manage the interaction of these three components. For example, a producer may choose to grow pest-tolerant plant varieties or manage the environment, such as by increasing plant spacing to reduce humidity, which helps prevent the development of pests.
Figure 1: The Plant Pest Triangle
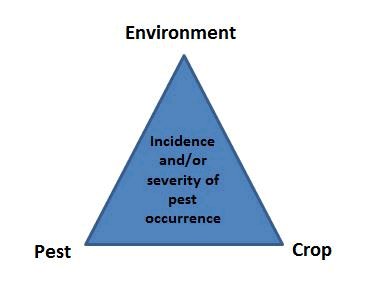
Description for photo - The Plant Pest Triangle
The image shows a triangle with the words "Incidence and/or severity of pest occurrence" written in it. By the top corner is the word "Environment". By the bottom right corner is the word "Crop". By the bottom left corner is the word "Pest".
1.3 Benefits of a Biosecurity Plan: What's In It For Me?
A benefit of a biosecurity plan is that it allows producers to take a preventative approach rather than managing the introduction or spread of pests. If a pest is detected, there are protocols already in place to facilitate a rapid response, thereby minimizing the damage from pests or their further spread and breaking the cycle of pest transmission between facilities. Other benefits of incorporating biosecurity measures into the day-to-day activities of a facility include the following:
- Manages the risk of business interruption as a result of harmful pest detections at a facility.
- Meets customer and consumer demand for pest-free and healthy plants.
- May assist in attracting new markets.
- Decreases production losses.
1.4 Elements of a Biosecurity Plan
Biosecurity plans will differ from one facility to another, as biosecurity measures and requirements will vary depending on the facility. A biosecurity plan may include a detailed facility map(s); training programs; and Standard Operating Procedures for elements such as pest monitoring and response as well as the movement of people, equipment and vehicles. Documenting these procedures can ensure consistent application and demonstrate to customers that a facility operates using biosecurity measures.
Other phytosanitary certification programs (e.g. Canada Greenhouse Certification Program, Japanese beetle program) may already be used within a facility and include elements that apply to biosecurity. These programs can be referenced as part of a biosecurity plan.
To develop a biosecurity plan, consider the following process:
Step 1: Develop a detailed map of the facility. A map can be useful for visualizing and identifying potential sources of pests or pathways of pest transmission. A map may include the entrance, shipping area, receiving area and high-risk areas. The flow of plant material, people and equipment within the facility can also be included.
Step 2: Identify the risks to the facility. Knowledge of pests and their pathways of transmission can help to identify pest risks as well as the biosecurity measures that can help mitigate these risks.
Step 3: Review current biosecurity measures. The self-assessment checklists and the Floriculture Sector Biosecurity Guide Self-Assessment Checklist and Action Work Plan can be used to help identify additional biosecurity measures that could be implemented at a facility.
Step 4: Identify biosecurity goals. Prioritize and establish a timeline for implementing the additional biosecurity measures identified after completing the self-assessment checklists or the Floriculture Sector Biosecurity Guide Self-Assessment Checklist and Action Work Plan.
Step 5: Develop an implementation strategy. Communication of the biosecurity practices and education and training of employees and visitors regarding biosecurity measures are an important part of the implementation strategy.
Step 6: Review and update the biosecurity plan. A biosecurity plan should be regularly reviewed and updated as new biosecurity information becomes available or if there are changes within a facility.
1.5 Implementing a Biosecurity Plan
As represented by Figure 2, the implementation of biosecurity measures in a facility forms a cycle of biosecurity activities. Assessment and re-assessment can be seen as both the starting and end points of the cycle, leading to a proactive approach.
Figure 2: Cycle of biosecurity activities
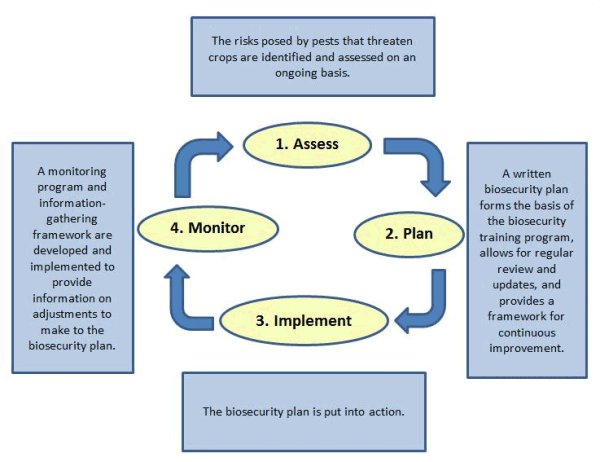
Description for photo - Cycle of biosecurity activities
Figure 2 is an illustration of the cycle of activities that should be completed to develop and implement a Biosecurity Plan. The cycle of biosecurity has four items with arrows pointing between them in a clockwise direction. The first item at the top of the cycle is "Assess". Moving clockwise, the second item is "Plan", the third is "Implement" and the fourth is "Monitor". There is a text box by each of these four items in the cycle. The text box by the word "Assess" states: "The risks posed by pests that threaten plants are identified and assessed on an ongoing basis." The text box by the word "Plan" states: "A written Plan forms the basis of the biosecurity training program, allows for regular review and updates, and provides a framework for preparedness." The text box by the word "Implement" states: "The Plan is put into action." The text box by the word "Monitor" states: "A monitoring program and information-gathering framework are developed and implemented to provide information on adjustments to make to the Plan."
Assess: Identify and assess pest introduction risks and analyze probable transmission pathways. This allows producers to address current biosecurity gaps within a facility. Production practices should be reviewed frequently (reassessed) to ensure that implemented measures are effective.
Plan: A written biosecurity plan is highly recommended. A written biosecurity plan allows for regular review and updates, supports continuous improvement within the facility and forms the basis for training.
Implement: Put the biosecurity plan into action. Education, training and communication are key to implementing the biosecurity plan.
Monitor: Develop and implement an information-gathering system that provides information to adjust the biosecurity plan. It is important to assess the design, effectiveness and implementation of the biosecurity plan routinely but also when there are changes in facility practices or when a biosecurity risk occurs.
2.0 Biosecurity Practices
2.1 Education, Training and Communication
Education, Training and CommunicationFootnote 3
Target outcome:
People entering or working within a place of production respect the biosecurity measures in place.
Benefits: A comprehensive understanding of your biosecurity plan helps ensure that it is effectively implemented – your biosecurity plan is only as good as its implementation.
Risks: After your biosecurity plan has been developed, education, training and communication is the first priority, as employees are the most important part of your biosecurity plan. Nearly all components of your biosecurity plan will be executed by your employees and, without proper education and training, the biosecurity practices may not be implemented properly. This increases the risk of pest introduction and spread into your facility and delays the detection of newly established pest populations. In addition, visitors, suppliers and service providers ("visitors" in the rest of this document) will frequently be present in your facility; communicating relevant biosecurity measures to them is vital to prevent them from introducing or spreading pests.
Guidelines
- Employees, consultants and contractors ("employees")
- Include employees in the design of your biosecurity plan. This may result in them taking more "ownership" of the biosecurity plan.
- Establish and include in your biosecurity plan a formal training program for new employees (depending on their role) that includes modules on the following:
- Pathways of pest transmission;
- Signs and symptoms of pests;
- Pest identification;
- Response measures for key pests of concern to your facility;
- Biosecurity measures that are in effect at your facility.
- Update the training program as the biosecurity plan evolves due to new information.
- Establish in your biosecurity plan a periodic refresher training program for existing employees that includes any new information.
- Assess the effectiveness of your training program. Using established criteria (e.g. review of practices during daily activities), assess whether employees are applying biosecurity measures appropriately or if there is a need for clarification.
- Use signage and visual aids to communicate the biosecurity measures in place at your facility, e.g. signs with images of common pests and symptoms for your crops. See Appendix 1 for examples of pest identification signs.
- Use plain language in training and communication materials.
- Provide information in the appropriate language for employees. Translate training and communication materials when necessary.
- Visitors
- For visitors who come to your facility regularly, provide training on the biosecurity measures that must be followed. (See section 2.4 for details on communication of measures to occasional visitors.)
Based on the above guidelines:
1. Are there procedures and communications tools in place at your facility to inform employees and visitors of the biosecurity measures in place?
![]()
![]()
2. What actions can you take to provide the necessary biosecurity information to employees and visitors?
![]()
![]()
Self-assessment checklist
Complete the following checklist to assess existing biosecurity practices at your facility and identify new biosecurity measures that should be incorporated into your biosecurity protocols. Indicate with a checkmark which of the following applies for each measure:
- Yes: Biosecurity measure is currently implemented and does not require further action.
- Sometimes: Biosecurity measure is not always successfully implemented and may require additional action.
- No: Biosecurity measure is not implemented and requires action.
- Not applicable (NA): Biosecurity measure does not apply to your facility and no action is required.
Biosecurity measures: Education, Training and Communication
| Biosecurity measure | Y | S | N | NA |
|---|---|---|---|---|
| Employees are included in the design of the biosecurity plan to promote "ownership". | ||||
| There is a formal training program for new employees. | ||||
| The employee training program includes modules on pathways of transmission, signs and symptoms of pests, pest identification, response measures for key pests of concern, and the biosecurity measures in effect. | ||||
| The training program is updated as the biosecurity plan evolves due to new information. | ||||
| There is a periodic refresher training program for existing employees. | ||||
| Employees are assessed to determine whether they are applying biosecurity measures appropriately or if there is a need for clarification. | ||||
| Signs and visual aids are used to communicate biosecurity measures, e.g. signs with images of common pests and symptoms. | ||||
| Plain language is used in training and communication materials. | ||||
| Information is provided in the appropriate language for employees. Training and communication materials are translated when necessary. |
| Biosecurity measure | Y | S | N | NA |
|---|---|---|---|---|
| Training on biosecurity measures is provided to visitors who come to the facility regularly. |
2.2 Location and Layout
Location and LayoutFootnote 4
Target outcome:
Knowledge of the location and layout is used to evaluate new sites and to protect existing or neighbouring sites.
Benefits: Understanding the pest risks from your facility's surroundings can help you develop efficient measures to prevent pest introductions. The design of your facility's layout can also help prevent the spread of pests between areas within your facility.
Risks: Factors related to the location and layout of your facility can increase the potential frequency and severity of pest introductions. For example:
- The environment of the area surrounding a facility, including neighbouring activities or the prevailing wind direction, may pose a pest risk.
- Drainage patterns and surface water movement can affect the potential for pest introduction and distribution.
- Alternate hosts in the vicinity of a facility may harbour pests and increase the risk of pest introduction.
- Layouts where employees must pass through infested areas can facilitate the spread of pests.
It is recognized that some of the biosecurity measures outlined in this section may only be applicable when building a new facility. However, some of these biosecurity measures can be implemented in existing facilities. For example, if plant material is received and shipped from the same area of the facility, the timing of these activities can be staggered so that plant material is not received at the same time as plant material is being prepared for shipping. It is also recognized that some transmission pathways associated with location and layout are more easily managed than others; for example, wind and water can be difficult to control.
Guidelines
- Selecting a location
- Neighbouring activities may pose a pest risk for your facility. Use this information to make risk management decisions on site selection. For example:
- Crops in production can serve as alternate hosts for pests.
- Timing of harvest can result in mass pest migration.
- Composting practices can result in pest migration.
- Importation of produce can introduce new pests.
- Non-agricultural activities can spread pests.
- Examine the plants surrounding your location, as these plants may harbour pests that could be introduced into the facility. Treatment or removal of these plants may be required.
- Plant crops on sites that are not at risk of pest introduction from the direction of prevailing winds, as wind can carry pests such as spores or insects.
- Select sites that are free from pests or alternate hosts of pests of concern.
- For plants that will be grown in open fields, conduct an assessment of the previous use of newly acquired or leased land. This will provide information on pests of concern that may be present and on potential buildup of chemical control products.
- Assess below-ground concerns such as compacted soil and low water-holding capacity that may impede drainage and increase the risk of pest entry through floodwater.
- Consider pest risks related to water availability, quality and accessibility, such as local water-taking regulations and the risks associated with the use of rainwater. If surface runoff water is used, assess the risks from the surrounding land use, such as pesticide runoff or animal manure. In addition, if water is recirculated, there is a risk of cross-contamination between different crops.
- Neighbouring activities may pose a pest risk for your facility. Use this information to make risk management decisions on site selection. For example:
- Orienting and structuring a facility
- Use topography to assist with drainage and reduction of standing water in production areas. Drainage patterns and surface water movement can affect the potential for pest introduction and distribution.
- Designate separate areas for processing, cultivation and propagation and locate these areas away from the production areas.
- Lay out the facility so that employees do not need to travel through restricted access or other high-risk areas in order to access other areas.
- Locate designated receiving areas for inspection of propagative material and plants from other sources away from production areas. Design receiving areas to allow for cleaning and treatment of inputs as needed and of the area itself.
- Locate washing stations for cleaning and disinfecting equipment and vehicles in a designated area. Consider the capacity for water supply and for wastewater collection and management.
- When designated areas cannot be separated by distance or physical barriers, consider other options such as timing (e.g. carrying out different activities within a certain area at different times).
- Locate areas for holding and disposal of growing media and crop waste at a sufficient distance from production areas and from water sources to prevent pest reintroduction. Consider wind direction, surface drainage and the location of vents in structures such as greenhouses when locating waste holding and disposal sites to avoid reintroduction of pests into production areas.
- Develop a map of the facility that illustrates the layout and includes areas such as production, propagation, receiving and shipping, as well as any outdoor production activities. It is recommended that the flow of people and material through the facility be indicated on the map.
- Surrounding pest pressure
- Ensure that enclosed growing structures and their entryways are designed and constructed to exclude outdoor pests.
- Consider screening key vents and air intake openings to exclude outdoor pests. Use screens that are appropriate for expected pests, e.g. thrips-proof screening if crops are especially susceptible to thrips.
- Pest pressure may vary throughout the year and activities could be scheduled for times when pest pressure is lower. Seasonality of pest incursions may include spring emergence of potential pests, immigration in fall, cropping activities at neighbouring facilities or seasonal production of favoured hosts such as poinsettia.
- Surroundings activities at certain times of the year may also influence pest pressure. For example, if pest pressure is high because a neighbour is harvesting crops, it may be best to keep crops indoors or check vent screens for holes.
- Perimeter management
- Maintain a weed-free buffer around the facility and around production areas, for example by regular mowing, to reduce the risk of pest introduction from weeds. In some instances, perimeter management is required for the management of specific pests such as Japanese beetle.
- For facilities that include outdoor production activities, cover crops can be used to suppress some insect pests and weeds. Cover crops can also promote some beneficial insects.
- Consider using shelter belts, berms, fencing and hedgerows to reduce pest immigration and manage drainage.
Based on the above guidelines:
1. Have pathways of pest transmission been considered in the location and layout of your facility?
![]()
![]()
2. What biosecurity measures can be implemented to mitigate the risks presented by the location and layout of your facility?
![]()
![]()
Self-assessment checklist
Complete the following checklist to assess existing biosecurity practices at your facility and identify new biosecurity measures that should be incorporated into your biosecurity protocols. Indicate with a checkmark which of the following applies for each measure:
- Yes: Biosecurity measure is currently implemented and does not require further action.
- Sometimes: Biosecurity measure is not always successfully implemented and may require additional action.
- No: Biosecurity measure is not implemented and requires action.
- Not applicable (NA): Biosecurity measure does not apply to your facility and no action is required.
Biosecurity measures: Location and Layout
| Biosecurity measure | Y | S | N | NA |
|---|---|---|---|---|
| Information on neighbouring activities such as crops, timing of harvest, composting, importation of produce, etc. is used to make risk management decisions on site selection. | ||||
| Plants surrounding the location are examined and are treated or removed as required. | ||||
| Crops are planted on sites that are not at risk of pest introduction from prevailing winds. | ||||
| Sites that are free from pests or alternate hosts of pests of concern are selected. | ||||
| When planting in open fields, the previous use of the land is assessed. | ||||
| Below-ground concerns that may impede drainage and increase the risk of pest entry through floodwater are assessed. | ||||
| Pest risks related to water availability, quality and accessibility are considered. | ||||
| If surface runoff water is used, the risk from the surrounding land use is assessed. | ||||
| If water is recirculated, the risk of cross-contamination between crops is assessed. |
| Biosecurity measure | Y | S | N | NA |
|---|---|---|---|---|
| Topography is used to assist with drainage and reduction of standing water in production areas. | ||||
| Separate areas are designated for processing, cultivation and propagation, and are located away from production areas. | ||||
| The facility is laid out so that employees do not need to travel through restricted or other high-risk areas in order to access other areas. | ||||
| Designated receiving areas for inspection of propagative material and plants from other sources are located away from production areas. | ||||
| The receiving area allows for cleaning and treatment of inputs and of the area. | ||||
| Washing stations for cleaning and disinfecting equipment and vehicles are located in a designated area. | ||||
| Other options such as timing have been considered when designated areas cannot be separated by distance or physical barriers. | ||||
| Areas for holding and disposal of growing media and crop waste are located at a sufficient distance from areas where plants are propagated or grown and from water sources to prevent pest reintroduction. | ||||
| Wind direction, surface drainage and locations of vents in structures are considered when locating waste holding and disposal sites. | ||||
| A map is developed that shows the layout, various areas, and flow of people and material of the facility. |
| Biosecurity measure | Y | S | N | NA |
|---|---|---|---|---|
| Enclosed growing structures and their entryways are designed and constructed to exclude outdoor pests. | ||||
| Key vents and air intake openings are covered with appropriate screening for expected pests. | ||||
| Activities are scheduled at times of the year when pest pressure is lower. | ||||
| Pest risks posed by activities in the surrounding area at certain times of the year (e.g. neighbours harvesting crops) are considered. |
| Biosecurity measure | Y | S | N | NA |
|---|---|---|---|---|
| A weed-free buffer is maintained around the facility and production areas. | ||||
| For outdoor production activities, cover crops are used to suppress pests. |
2.3 High-Risk Areas
High-Risk AreasFootnote 5
Target outcome:
Controlled Access Zones (CAZs) and Restricted Access Zones (RAZs) are established and communication protocols which explain the importance of these areas within the place of production are implemented.
Benefits: Pests are contained and vulnerable areas are protected.
Risks: Different areas within a facility pose a higher or lower pest risk depending on the type of material or the activities carried out within them. Each area in a facility should be assessed and a level of risk should be assigned accordingly. Assessing the risk level of each area and identifying high-risk areas can inform biosecurity measures to prevent the introduction and spread of pests in a facility, reducing the biologic or economic impact of pest incursions.
Controlled and Restricted Access Zones are used to prevent the spread of pests into or out of high-risk areas.
There are two main reasons why an area would be designated as high-risk:
- The area contains material that is especially vulnerable to pest incursions because of potential biological or economic impacts. For example:
- The area is used for propagation or contains mother plants that are used for propagation.
- The area contains crops that are highly valuable such as crops with long production cycles.
- The area contains plants that are particularly vulnerable to a certain pest.
- The area is more likely to contain pests. For example:
- An area that is used to store or receive inputs that pose an unknown pest risk, such as plants from an outside source that have not yet been inspected for pests.
- An area where potentially infested material is stored or disposed of, such as disposal sites.
- The area or plants can serve as a source of pests that can be transmitted to other areas of the facility (e.g. infested or quarantined areas).
- Infested areas may have a high prevalence of pests that have a low impact, e.g. fungus gnats.
- Infested areas may have a low prevalence of pests that have a high impact, e.g. leaf miners and mealy bugs.
Guidelines
- Designate high-risk areas
- Identify and designate specific high-risk areas to indicate where biosecurity intervention is warranted in the facility and in the production continuum.
- High-risk areas may require restricted or controlled access to protect plant material or to limit the spread of a pest from an infested area or plant.
- Manage risks related to moving people and equipment into and out of high-risk areas
See also section 2.4: Movement of People, Equipment and Vehicles.
- Space and physical barriers:
- Control access to high-risk areas with locked gates, automated doors and signs indicating traffic flow (see Appendix 2 for an example). Note that other factors such as emergency escape routes may need to be considered.
- Limit access to high-risk areas to authorized employees only.
- Include contact information for employees responsible for administering the high-risk areas on signage.
- Process:
- Based on the location of high-risk areas, use specific routes to move inputs, people, equipment, vehicles and outputs to ensure pests are not spread from infested areas to vulnerable areas (e.g. one-way routes between these areas).
- If high- and low-risk activities are carried out within the same area, use timing to mitigate pest risk. For example, arrange for receipt and inspection of inputs at a different time from shipping finished product, with time allotted to clean the shipping and receiving area between activities as needed.
- Use dedicated equipment in high-risk areas. Clean and disinfect equipment before moving it between areas of different risk.
- Space and physical barriers:
Based on the above guidelines:
1. Does your facility have areas that should be designated as high-risk and would benefit from controlled or restricted access?
![]()
![]()
2. What steps can you take to better isolate high-risk areas?
![]()
![]()
Self-assessment checklist
Complete the following checklist to assess existing biosecurity practices at your facility and identify new biosecurity measures that should be incorporated into your biosecurity protocols. Indicate with a checkmark which of the following applies for each measure:
- Yes: Biosecurity measure is currently implemented and does not require further action.
- Sometimes: Biosecurity measure is not always successfully implemented and may require additional action.
- No: Biosecurity measure is not implemented and requires action.
- Not applicable (NA): Biosecurity measure does not apply to your facility and no action is required.
Biosecurity measures: High-Risk Areas
| Biosecurity measure | Y | S | N | NA |
|---|---|---|---|---|
| High-risk areas in the facility have been identified and designated. | ||||
| Access to high-risk areas has been restricted or controlled. |
| Biosecurity measure | Y | S | N | NA |
|---|---|---|---|---|
| Access to high-risk areas is controlled with locked gates, automated doors and signs. | ||||
| Access to high-risk areas is limited to authorized employees only. | ||||
| Signs include contact information for employees responsible for administering the high-risk areas. |
| Biosecurity measure | Y | S | N | NA |
|---|---|---|---|---|
| Specific routes are used to move inputs, people, equipment, vehicles and outputs to ensure pests are not spread from infested to vulnerable areas. | ||||
| If high- and low-risk activities are carried out within the same area, timing is used to mitigate pest risk. | ||||
| Equipment has been dedicated for use in high-risk areas only. | ||||
| Equipment is cleaned and disinfected before being moved between areas of different risk. |
2.4 Movement of People, Equipment and Vehicles
Movement of People, Equipment and VehiclesFootnote 6
Target outcome:
The movement of people, vehicles and equipment does not introduce or spread pests within a place of production.
Benefit: Avoiding the introduction and spread of pests within a facility via people, equipment and vehicles reduces costs and production losses.
Risks: The movement of people, equipment and vehicles may introduce or spread pests within your facility. For example, visitors can introduce pests from outside your facility and employees can spread pests from quarantine areas to production areas.
Guidelines
- Managing people (see also 2.1: Education, Training and Communication)
- Employees and visitors:
- Ensure only areas that are necessary for a person's activities are accessed.
- Make a map of the facility available to help provide an understanding of the biosecurity measures in place.
- Place signs at main entrances of the facility and entrances to high-risk areas to indicate that biosecurity measures must be respected. See Appendix 2 for an example of a sign used to control access to high-risk areas.
- Provide sanitation infrastructure (e.g. hand-wash stations, alcohol-based sanitizers, foot baths) at appropriate points in the traffic flow to prevent spread of pests between or within areas. For example, alcohol-based sanitizers can be used to prevent transmission of bacterial leaf spot on workers' hands in orchid production.
- Employees:
- Incorporate information about traffic flow and areas of different risk into employee training.
- Visitors:
- Have visitors report to the office or have an employee meet them in a designated area to receive a briefing on applicable biosecurity measures.
- Keep a visitor log at the facility entrance. Information recorded may include the date visited, the areas visited and the most recent contact with floriculture material prior to visiting your facility. This information may be useful when responding to pest detections.
- Ask visitors if they have been to other production sites that day. If yes, assess the risk and ensure that appropriate biosecurity measures are followed (e.g. cleaning footwear, wearing disposable outerwear or boot covers).
- Ensure that visitors understand and respect the biosecurity measures for the areas of the facility they visit, such as by having an employee accompany them. Use signage to provide reminders of the biosecurity measures that must be followed.
- Provide disposable outerwear and footwear to people entering production areas.
- Employees and visitors:
- Managing equipment
- Clean and disinfect equipment when moving it between different production areas to prevent the spread of pests.
- Clean equipment prior to storage to prevent the spread of pests to the storage
- When using tools in the same production area, clean and disinfect tools prior to use, between crops, between mother plants and/or on a regular schedule.
- Equipment and tools must be cleaned to remove any soil and debris prior to disinfection. The presence of organic debris can reduce the effectiveness of disinfectants.
- Strategically sequence activities to minimize cleaning of equipment.
- Managing vehicles
- Drive vehicles on designated routes where possible.
- Designate parking areas for employee and visitor vehicles.
- Use a vehicle from your facility to transport visitors within the facility. When this is not possible, inspect off-facility vehicles and clean and disinfect them as needed prior to entry into the facility.
Based on the above guidelines:
1. Do you have a process in place to manage the flow of people, equipment and vehicles within your facility?
![]()
![]()
2. What steps can you take to more fully implement or improve these processes?
![]()
![]()
Self-assessment checklist
Complete the following checklist to assess existing biosecurity practices at your facility and identify new biosecurity measures that should be incorporated into your biosecurity protocols. Indicate with a checkmark which of the following applies for each measure:
- Yes: Biosecurity measure is currently implemented and does not require further action.
- Sometimes: Biosecurity measure is not always successfully implemented and may require additional action.
- No: Biosecurity measure is not implemented and requires action.
- Not applicable (NA): Biosecurity measure does not apply to your facility and no action is required.
Biosecurity measures: Movement of People, Equipment and Vehicles
| Biosecurity measure | Y | S | N | NA |
|---|---|---|---|---|
| Only areas that are necessary for a person's activities are accessed. | ||||
| A map of the facility is made available. | ||||
| Signs are placed at main entrances of the facility and entrances to high-risk area to indicate that biosecurity measures must be respected. | ||||
| Sanitation infrastructure (e.g. hand-wash stations, alcohol-based sanitizers, foot baths) is provided at appropriate points in traffic flow. | ||||
| Disposable outerwear and footwear are worn by those entering a high-risk area. | ||||
| The biosecurity plan and training programs include information on high-risk areas and traffic flow. | ||||
| Alcohol-based sanitizers are used when hand-wash stations are not available. |
| Biosecurity measure | Y | S | N | NA |
|---|---|---|---|---|
| Employees have been trained on traffic flow and areas of different risk. |
| Biosecurity measure | Y | S | N | NA |
|---|---|---|---|---|
| Visitors report to the office or have an employee meet them in a designated area for a briefing on biosecurity measures. | ||||
| A visitor log is kept to record information such as the date, areas of the facility visited and recent contact with floriculture material. | ||||
| Visitors are asked if they have visited other production sites that day. If yes, the risk is assessed and appropriate biosecurity measures are followed. | ||||
| Visitors understand and respect the biosecurity measures in place in the areas they visit. | ||||
| Visitors are accompanied by an employee to ensure biosecurity measures are followed. | ||||
| Signage is used as a reminder of the biosecurity measures that must be followed. | ||||
| Disposable outerwear and footwear are provided for those entering production areas. |
| Biosecurity measure | Y | S | N | NA |
|---|---|---|---|---|
| Equipment is cleaned and disinfected when moved between production areas. | ||||
| Equipment is cleaned prior to storage. | ||||
| Tools used in the same production area are cleaned and disinfected prior to use, between crops, between mother plants and/or on a regular schedule. | ||||
| Equipment and tools are cleaned to remove soil and debris prior to disinfection. | ||||
| Activities are strategically sequenced to minimize cleaning of equipment. |
| Biosecurity measure | Y | S | N | NA |
|---|---|---|---|---|
| Vehicles are driven on designated routes where possible. | ||||
| There are designated parking areas for employees and visitors. | ||||
| A vehicle from the facility is used to transport visitors within the facility. | ||||
| When it is not possible to use a facility vehicle, off-facility vehicles are inspected and are cleaned and disinfected as needed prior to entry. |
2.5 Maintenance
MaintenanceFootnote 7
Target outcome:
Introduction and spread of pests is limited by keeping buildings and equipment in good repair.
Benefits: Good maintenance of your facility makes it easy to clean, prevents the entry and spread of pests, and enhances timely detection of pests, potentially reducing pest management costs.
Risks: If buildings and equipment are not kept in good repair and cleaned and disinfected regularly, the risk of pest introduction and spread may increase. For example, weeds in and around the facility may harbour and support pest populations, while irrigation tanks may provide a reservoir of pathogens.
Guidelines
- Develop and implement a routine facility and property maintenance program that includes preventative maintenance activities. This may include separate biosecurity plans for the interior and exterior of the facility.
- Keep the production areas (including under benches) free from weeds, as they may harbour pests.
- Maintain a weed-free buffer around the facility.
- Keep a record of maintenance activities. A checklist may be used to record the timing and activities that have been completed.
- Particularly for areas protected by insect screening, minimize or eliminate areas where pests can enter by ensuring holes and gaps in screening are fixed, doors close properly and windows can be closed.
- Include cleaning and disinfection of the structure, irrigation system (including lines and tanks), walkways, benches, tarps, containers and other equipment in the maintenance program.
- Some facilities are highly mechanized and this equipment is not always easy to clean. When using this machinery, inspect and verify that propagative material is free from pests of concern to mitigate the risk of pest spread.
- Conduct clean-up between crops and at the end of the season. Specific temperature extremes can be used to eliminate pests when the facility is empty between crops. Consult the manufacturer's specifications as some extreme temperatures can damage equipment or the structure or threaten insurance coverage.
- Follow label directions when using cleaners and disinfectants, and ensure an appropriate contact time with the equipment.
Based on the above guidelines:
1. Do you have a maintenance schedule for your facility, including cleaning and disinfection?
![]()
![]()
2. Are there points in the production cycle that present an opportunity for post-crop sanitation? How can this be achieved?
![]()
![]()
Self-assessment checklist
Complete the following checklist to assess existing biosecurity practices at your facility and identify new biosecurity measures that should be incorporated into your biosecurity protocols. Indicate with a checkmark which of the following applies for each measure:
- Yes: Biosecurity measure is currently implemented and does not require further action.
- Sometimes: Biosecurity measure is not always successfully implemented and may require additional action.
- No: Biosecurity measure is not implemented and requires action.
- Not applicable (NA): Biosecurity measure does not apply to your facility and no action is required.
Biosecurity measures: Maintenance
| Biosecurity measure | Y | S | N | NA |
|---|---|---|---|---|
| A routine facility and property maintenance program is developed and implemented, including preventative activities. | ||||
| Production areas are kept free from weeds. | ||||
| A weed-free buffer is maintained around the facility. | ||||
| Records of maintenance activities are kept. | ||||
| Holes and gaps in screens have been fixed, and doors and windows can be closed. | ||||
| The maintenance program includes cleaning and disinfection of the structure, irrigation system (including lines and tanks), walkways, benches, tarps, containers and other equipment. | ||||
| When using machinery that is not easily cleaned, propagative material is inspected and verified free of pests of concern. | ||||
| Clean-up is conducted between crops and at the end of the season. | ||||
| Label directions for cleaners and disinfectants are followed. |
2.6 Production Inputs
Production InputsFootnote 8
Target outcome:
Production inputs are not a potential source of pests.
Benefits: Managing production inputs ("clean start") is the single most effective measure to prevent the introduction of pests into your facility.
Risks: Inputs such as propagative material, soil, growing media, water or packaging material can potentially introduce pests to the facility, including pests resistant to chemical controls due to repeated exposure at other facilities. Failure to effectively manage biosecurity risks from inputs may lead to pest problems being encountered more frequently, which can increase crop waste and the costs associated with correcting pest problems. Treating large areas of production later is also less cost-effective than treating small plants at receipt or shortly thereafter (e.g. cutting dips using registered products, preventative fungicide treatments).
Guidelines
- All inputs
- The desired quality of inputs is identified and a Standard Operating Procedure for inspection is in place that clearly identifies the criteria for acceptance of an input. Quality can include freedom from pests as well as factors that contribute to the growth of healthy crops, which can help prevent pest issues by avoiding plant stress (see also section 2.7 Plant Health).
- Ensure inputs have been inspected and quality-assured or certified as required (e.g. produced under the Greenhouse Certification Program) prior to shipment and arrival at the facility.
- When inputs arrive, segregate, inspect and/or store them as appropriate in a designated area away from production areas prior to any distribution or movement further within the facility.
- Manage any pests found. This includes but is not limited to:
- Disposal of the infested input.
- Cleaning or disinfection of the input.
- Management of the pests using chemical, biological, physical or cultural controls.
- Use information on the condition of an input to guide your production practices (e.g. redirect water of a less-than-ideal quality to more pest-tolerant crops).
- Maintain purchasing records for inputs. Records of the source of an input and, for plants, the number of plants and date planted, can be important when responding to pest detections.
- Nutrients, growing media and water management
- Soil and growing media may contain pests. Source sterile media or consider treatment options such as heat pasteurization, solarization or fumigationFootnote 9 prior to planting if pests are present at levels that may cause damage to plants.
- Know the source of the water supplied to the facility and schedule regular testing for pathogens, nutrient levels, pH and salt level. Water quality and quantity may impact the health of a plant and increase vulnerability to pests.
- Conduct testing for water quality and pathogen detection after a significant event, for example, after harvest or spraying at a neighbouring property, or after a storm with heavy rainfall.
- If recycling water, consider a treatment system to prevent the spread of pests within the facility. Recycled water can also be redirected to crops that are more pest-tolerant.
- Plant material
- Propagative material can be the source of pest introductions. Assess the pest risks associated with different suppliers and geographical sources of plant material. If the risk level is unknown, it may be considered high by default.
- Provide training to employees regarding which pests might be present and how to inspect for them.
- Inspect material upon entry into the facility and isolate it for a period of time to monitor and identify pests that may be present, especially for material that is more likely to be infested due to source or susceptibility to pests. If isolation is not possible, other options such as increased monitoring may be considered. Base the duration of the isolation on risk level and the life-cycle of pests of concern. For example, insect pests may be present as eggs and are therefore difficult to detect immediately; a follow-up inspection after an appropriate length of time may be needed.
- Avoid co-mingling of new plants or product coming into the facility with older material and mother stock.
- Where possible, avoid co-mingling plants that are hosts of the same pest, especially highly susceptible crops.
- When possible, choose pest-tolerant varieties or cultivars.
- Biological control agents
- Check that biological control agents are alive and vigorous upon receipt, as per publicly available quality control guidelines.
- Containers
- Clean and disinfect recyclable or reusable containers prior to reuse.
Based on the above guidelines:
1. Which inputs could potentially introduce pests into your facility?
![]()
![]()
2. What steps can be taken to reduce the pest risk posed by these inputs?
![]()
![]()
Self-assessment checklist
Complete the following checklist to assess existing biosecurity practices at your facility and identify new biosecurity measures that should be incorporated into your biosecurity protocols. Indicate with a checkmark which of the following applies for each measure:
- Yes: Biosecurity measure is currently implemented and does not require further action.
- Sometimes: Biosecurity measure is not always successfully implemented and may require additional action.
- No: Biosecurity measure is not implemented and requires action.
- Not applicable (NA): Biosecurity measure does not apply to your facility and no action is required.
Biosecurity measures: Production Inputs
| Biosecurity measure | Y | S | N | NA |
|---|---|---|---|---|
| A Standard Operating Procedure for the inspection of inputs that specifies desired quality and identifies clear criteria for acceptance of inputs has been implemented. | ||||
| Inputs are inspected and quality-assured or certified as required prior to arrival at the facility. | ||||
| Inputs are segregated, inspected and/or stored in a designated area away from production areas before being moved further into the facility. | ||||
| Any pests found are managed (disposal, cleaning, disinfection, etc.). | ||||
| Information on the condition of inputs is considered when establishing production practices. | ||||
| Purchasing records for inputs are maintained. |
| Biosecurity measure | Y | S | N | NA |
|---|---|---|---|---|
| Sterile media is used or soil and growing media are treated prior to planting if pests are present at damaging levels. | ||||
| The source of the facility's water is known and water is routinely tested for pathogens, nutrient levels, pH and salt level. | ||||
| Water is tested for quality and pathogens after significant events (e.g. after heavy rainfall). | ||||
| Recycled water is treated or redirected to more pest-tolerant crops. |
| Biosecurity measure | Y | S | N | NA |
|---|---|---|---|---|
| The pest risks associated with different suppliers and geographical sources of plant material are assessed. | ||||
| Employees know which pests might be present and how to inspect for them. | ||||
| Material is inspected on arrival and isolated for an appropriate period of time for monitoring, based on the risk level and life-cycle of pests of concern. | ||||
| Co-mingling of new plants with older material and mother stock is avoided. | ||||
| Co-mingling of plants that are hosts of the same pest is avoided where possible. | ||||
| Pest-tolerant varieties or cultivars are chosen when possible. |
| Biosecurity measure | Y | S | N | NA |
|---|---|---|---|---|
| Biological control agents are checked upon receipt to verify that they are alive and vigorous. |
| Biosecurity measure | Y | S | N | NA |
|---|---|---|---|---|
| Recyclable or reusable growing containers are cleaned and disinfected prior to reuse. |
2.7 Plant Health
Plant HealthFootnote 10
Target outcome:
The combination of Best Management Practices and the implementation of biosecurity measures optimizes the production of healthy plants.
Benefit: Healthy plants are better able to withstand pest pressure.
Risks: If biosecurity measures are not applied to complement your production Best Management Practices, the risk of pest introduction and spread may increase. Poorly managed growing conditions and environmental controls may increase plant stress and create an environment that allows pests to thrive.
Guidelines
Please see Appendix 5: Additional Resources for detailed guidance on growing practices.
- Growing conditions
- Manage growing conditions to support crop growth while minimizing their susceptibility to pest attack. Certain growing conditions such as high humidity can promote the establishment of pests (fungus or mould), but may be required for the production of some plants. In these situations where growing conditions may create risks, consider counter-measures such as increased airflow or increased plant spacing to minimize potential outbreaks.
- Physical injury to plants from equipment, pruning or environmental conditions (e.g. hail, frost, heavy rains) can make the plants more vulnerable to pest attacks and damage.
- Ensure that an adequate fertilizer program is in place, as nutrient-deficient or over-fertilized crops are more vulnerable to pests.
- Different types of irrigation systems (e.g. flood, drip, hydroponics, overhead irrigation) pose different plant health management concerns. Become familiar with common problems posed by the type of irrigation system at your facility. For example, overhead irrigation increases humidity and moisture on plant surfaces, which can promote the growth of fungi; you may wish to use additional airflow to compensate.
- Do not keep personal houseplants or vegetable plants in production areas.
- Environmental impacts and stress
- Environmental stress, such as frost damage or water stress, can increase crop susceptibility to pest attacks and the severity of pest impacts. Reducing plant stress by maintaining optimal environmental controls and protecting crops against inclement weather can minimize pest outbreaks.
- Stress as a production tool
- It is recognized that intentional or managed plant stress (used to maintain vegetative growth, induce flowering, or for hardening off) can be used as a production tool. Moderate stress may increase plant resistance to pests, but excessive stress (distress) may increase susceptibility, resulting in increased pest damage. If stress is used, it may be necessary to apply additional pest risk mitigation measures, such as increased pest monitoring.
Based on the above guidelines:
1. What growing conditions in your facility could affect the health of your crops and make them more vulnerable to pests?
![]()
![]()
2. How can you adjust the growing conditions in your facility to make your crops more resistant to pests?
![]()
![]()
Self-assessment checklist
Complete the following checklist to assess existing biosecurity practices at your facility and identify new biosecurity measures that should be incorporated into your biosecurity protocols. Indicate with a checkmark which of the following applies for each measure:
- Yes: Biosecurity measure is currently implemented and does not require further action.
- Sometimes: Biosecurity measure is not always successfully implemented and may require additional action.
- No: Biosecurity measure is not implemented and requires action.
- Not applicable (NA): Biosecurity measure does not apply to your facility and no action is required.
Biosecurity measures: Plant Health
| Biosecurity measure | Y | S | N | NA |
|---|---|---|---|---|
| Growing conditions are managed to minimize crop susceptibility to pests. Where growing conditions create risks, counter-measures (e.g. plant spacing to reduce humidity or prevent pest from moving between plants) are implemented. | ||||
| Physical injury to plants is considered when assessing vulnerability to pests. | ||||
| An adequate fertilizer program is in place. | ||||
| The risks posed by the irrigation system in place are considered and compensated for as needed. | ||||
| Personal plants are not kept in production areas. |
| Biosecurity measure | Y | S | N | NA |
|---|---|---|---|---|
| Plant stress is reduced by maintaining optimal environmental controls and protecting crops against inclement weather. |
| Biosecurity measure | Y | S | N | NA |
|---|---|---|---|---|
| If pest susceptibility increases due to excessive plant stress, additional pest risk mitigation measures are implemented. |
2.8 Integrated Pest Management
Integrated Pest ManagementFootnote 11
Target outcomes:
- Biosecurity measures are implemented at critical points in pathways of pest transmission.
- Production losses are minimized through the early detection of pests.
- An Integrated Pest Management (IPM) program is developed to respond to common pests.
- Formal response plans are created for pests of greater concern.
Benefits: Integrated Pest Management (IPM) reduces crop losses by offering a wide range of pest prevention and response options, including production practices that can be used in combination for maximum effectiveness.
Risks: IPM is an ecosystem-based strategy that focuses on prevention and management of pests through a combination of techniques. The cornerstone of IPM is pest monitoring. Without pest monitoring, common pests may not be detected in a timely manner and the effectiveness of any control program will not be known. IPM also includes preventative and curative pest management measures. Without preventative measures, pest populations may reach levels that cause greater damage to crops and are more costly to manage. For pests that establish, formal response plans allow for an effective and timely response if a pest of particular concern is introduced and/or spreads within a facility.
Guidelines
i. Pest monitoring
- Identify the pests of concern for your facility, their symptoms and appropriate monitoring methods (see the tables at the end of this section for examples). Pest monitoring tools can include sticky cards, light traps, pheromone traps, plant tapping, trap plants or visual pest scouting.
- A good monitoring program is timed such that it allows for different responses. For example, detecting a pest population early, even though it may not be above the threshold for a pesticide spray, may allow the manager to employ slow-acting measures such as changes to agronomic practices (adjusting plant spacing, fertilisation, watering, temperature), physical tools (sticky traps) or biological agents (require time to disperse in the crop and predation or parasitism may have a delay in effect). Some pesticides are slow-acting (e.g. stomach poisons, insect growth regulators), and some are preventative (many fungicides) and are used when environmental conditions warrant or are recommended due to a predictive model. Include in the monitoring program a focus on susceptible times in the production cycle (e.g. flowering) or periods where control options are more likely to be successful or cost-effective. Also take into account the pest stage that is most effectively detected.
- Monitoring can be both informal and formal. Both types of monitoring may be included in a monitoring program.
- Informal monitoring is constant and complements scheduled formal monitoring. It occurs instinctively during regular production activities: any employee can engage in informal monitoring. It is therefore useful to provide training to employees on recognizing pests of concern and their signs and plant symptoms, as well as on the process for reporting pest detections. Consider providing pest fact sheets (see for example Appendix 3 and Appendix 4) that explain how to identify pests of concern. (See also section 2.1 Education, Training and Communication.)
- Formal monitoring is a planned, systematic process to detect and quantify pests. Successful facilities have a trained, dedicated individual for this who knows what to look for, whether a designated employee or an outside consultant.
- When an unknown pest is detected, preserve a sample to allow accurate identification. If possible, collect multiple samples and life stages, including adult stages, as these are often required for a successful insect identification.
- Preserve insects and other arthropods in 70% ethanol, or by freezing.
- Preserve plant material showing disease symptoms in a paper bag (not a sealed plastic bag as opportunistic fungi will likely contaminate the sample).
- Preserve weeds by pressing between sheets of paper.
- Any pest can be recorded by photography, but identification is not always possible from a photograph.
- Refer unknown pests to qualified individuals for identification (e.g. Agriculture and Agri-Food Canada's National Identification Service, Guelph diagnostic lab, provincial ministry of agriculture specialists).
- Include surveillance of indirect pests such as vectors in your monitoring program. Insects may act as vectors for pests of concern (e.g. thrips can vector plant viruses such as Impatiens necrotic spot virus); consider this risk in an IPM program.
- Conduct follow-up monitoring to assess the effectiveness of the control strategy implemented. Record information on the follow-up strategy used and its success.
- Maintain records of monitoring activities, especially pest detections, including the location of the pest in the facility, location on the plant, date and crop type. Analyze your records regularly to predict high-risk times and locations and to assess the efficacy of preventative or corrective actions.
Example of an inventory of pests of concern and their symptoms, created to facilitate pest scoutingFootnote 12
| Aphid | Cater- pillar | Fungus gnat | Leaf- hopper | Leaf- miner | Mealy bug | Midge, gall fly | Cyclamen mite | Spider mite | Plant bug | Scale | Shore fly | Slug, snail |
|---|---|---|---|---|---|---|---|---|---|---|---|---|
| x | x | x | x | x |
| Aphid | Cater- pillar | Fungus gnat | Leaf- hopper | Leaf- miner | Mealy bug | Midge, gall fly | Cyclamen mite | Spider mite | Plant bug | Scale | Shore fly | Slug, snail | |
|---|---|---|---|---|---|---|---|---|---|---|---|---|---|
| Galls | x | x | |||||||||||
| Holes | x | x | x | ||||||||||
| Lineal mines | x | ||||||||||||
| Notches on margins | |||||||||||||
| Skeleton- ization | x | x | |||||||||||
| Speckling | x | x |
| Aphid | Cater- pillar | Fungus gnat | Leaf- hopper | Leaf- miner | Mealy bug | Midge, gall fly | Cyclamen mite | Spider mite | Plant bug | Scale | Shore fly | Slug, snail | |
|---|---|---|---|---|---|---|---|---|---|---|---|---|---|
| Dark fecal spots on leaf | x | x | x | ||||||||||
| Honeydew/ sooty mould | x | x | x | ||||||||||
| Insects clustered on stems or leaves | x | x | x | x | x | ||||||||
| Insects fall out of flowers when tapped | x | ||||||||||||
| Insects seen to move in flowers when blown on | |||||||||||||
| Insects or eggs on underside of leaf | x | x | x | ||||||||||
| Insect skins on leaf | x | x | x | ||||||||||
| Pests hide under objects | x | ||||||||||||
| Slime trails | x | ||||||||||||
| Small black flies | x | x | x | ||||||||||
| Webbing | x | x |
Example of an inventory of pests of concern and appropriate monitoring methodsFootnote 13
| Aphid | Fungus gnat | Leafhopper | Leafminer | Mite | Moth | Plant bug | Shore fly | Thrips | Whitefly | |
|---|---|---|---|---|---|---|---|---|---|---|
| Yellow sticky cards at top of plant canopy | x | x | x | x | x | x | x | |||
| Blue sticky cards at top of plant canopy | x | |||||||||
| Trap crops/catch plants | x | x | x | |||||||
| Potato sections on soil surface | x | |||||||||
| Light traps | x | |||||||||
| Visual inspection | x | x | x | x | x | x | x | x | x | x |
ii. Pest management
All pests
- Stay informed about the regulated and non-regulated pests of concern to your facility and to your export markets, including pest life cycles and signs and symptoms of infestations.
- Implement an IPM program that includes a process to quickly build a situation-specific response to a pest find. Include processes to confirm the pest identity, assess the pest risk and determine the most appropriate control measures.
- When a pest is found, enhanced monitoring may be necessary in order to quantify the level of infestation or assess the effectiveness of applied control measures.
- For non-regulated pests, pest thresholds may be established to trigger the use of a particular treatment. What constitutes a threshold is complex as there are different thresholds for different crops, pests and methods of control. When determining thresholds, there is also a difference between the objectives of suppression, eradication, and management. (This does not apply for regulated pests as even a single pest find must be reported; see below for details.)
- Note that there is value in applying treatments preventatively before pests are detected, to prevent pests from establishing damaging populations. Treatments may also be applied preventatively when pests are present at a low level to keep populations at a non-damaging level.
- Be aware of the secondary impacts of actions taken to treat pests. For example, chemical pesticides can cause phytotoxicity and harm biological controls. Impacts of insecticides on biological controls can be researched on online databases before application. There can also be negative interactions between different biological controls; detailed records of all treatments applied and responses of pests and natural enemies can help identify such conflicts.
- Develop a pesticide resistance management strategyFootnote 14. Regularly rotate pesticides in different chemical classesFootnote 15 to avoid developing a pesticide-resistant pest population. Pests on imported plants or cuttings may already be resistant to pesticides used in Canada. Ask suppliers about the chemical program used on imported material to inform IPM decisions. When pesticide resistance is encountered, alternative control methods such as biological controls may be considered.
- Activities on neighbouring facilities, such as harvesting, may increase the risk of pests migrating into your fields or entering your greenhouse through vents or other openings. When this occurs, additional methods of pest control may need to be considered, such as prophylactic release of biological control agents or the use of pesticides or mechanical controls (e.g. mass trapping).
- Crop rotation may be used to disrupt the life cycle of pests.
- To limit the spread of pests, do not mix infested material with other product or allow them to come into contact with each other. Contain (bag or box) or treat infested materials prior to moving them through the facility.
- Periodically assess the effectiveness of the pest management plan to foster continuous improvement and efficiencies. For example, has the monitoring program successfully detected non-regulated pests at low population densities or has the pest management tool achieved its purpose?
Regulated pests
- When a regulated pestFootnote 16 is identified, the Canadian Food Inspection Agency (CFIA) and the provincial or territorial government must be contacted to report the detection. In your response plan, include the contact information of the local CFIA office, provincial extension specialists and sector association(s).
- If a regulated pest is suspected, limit potential spread by controlling or restricting movement of plant material, people and equipment in and out of the infested area.
Based on the above guidelines:
1. What are the pests of concern for your facility?
![]()
![]()
2. What monitoring measures would allow you to detect these pests in a timely manner?
![]()
![]()
3. What is your treatment plan for each of these pests, both preventative and curative?
![]()
![]()
Self-assessment checklist
Complete the following checklist to assess existing biosecurity practices at your facility and identify new biosecurity measures that should be incorporated into your biosecurity protocols. Indicate with a checkmark which of the following applies for each measure:
- Yes: Biosecurity measure is currently implemented and does not require further action.
- Sometimes: Biosecurity measure is not always successfully implemented and may require additional action.
- No: Biosecurity measure is not implemented and requires action.
- Not applicable (NA): Biosecurity measure does not apply to your facility and no action is required.
Biosecurity measures: Integrated Pest Management
| Biosecurity measure | Y | S | N | NA |
|---|---|---|---|---|
| Pests of concern are identified, as well as their symptoms and appropriate monitoring methods. | ||||
| A pest monitoring program has been developed. | ||||
| The monitoring program is designed to detect pests early to allow for a broad range of response measures. | ||||
| The monitoring program considers the pest stages that are most effectively detected. | ||||
| The monitoring program considers susceptible times in the production cycle. | ||||
| The monitoring program considers periods where control options are more likely to be successful or cost-effective. | ||||
| Both formal and informal monitoring are integrated into the monitoring program. | ||||
| Employees are trained to recognize pests of concern and their signs and symptoms, and know how to report pest detections. | ||||
| For formal monitoring, a trained, dedicated employee has been designated or an outside consultant is used. | ||||
| When an unknown pest is detected, a sample is preserved for identification, including multiple life stages. | ||||
| Unknown pests are referred to qualified individuals for identification. | ||||
| The monitoring program includes surveillance of indirect pests such as vectors of pests of concern. | ||||
| The monitoring program includes surveillance of indirect pests such as vectors of pests of concern. | ||||
| Information on follow-up strategies used and their success is recorded. | ||||
| Records of monitoring activities and pest detections are maintained. | ||||
| Records are analyzed regularly to predict high-risk times and locations and to assess the efficacy of preventative or corrective actions. |
| Biosecurity measure | Y | S | N | NA |
|---|---|---|---|---|
| An Integrated Pest Management program is implemented. | ||||
| Information is regularly gathered regarding regulated and non-regulated pests of concern for the facility and for export markets. | ||||
| The program includes a process for rapid responses to specific pest finds. It includes identifying pests, determining risk and identifying control measures. | ||||
| When a pest is found, enhanced monitoring is used to quantify the level of infestation and assess the effectiveness of control measures. | ||||
| Pest thresholds are established to determine when to treat non-regulated pests. | ||||
| Preventative treatments are applied as appropriate. | ||||
| Potential secondary impacts of control measures are known. | ||||
| A pesticide resistance management strategy has been developed. | ||||
| Pest control methods are considered to prevent pests from neighbouring facilities entering the greenhouse. | ||||
| Crop rotation is used to disrupt the life cycle of pests. | ||||
| Infested material is isolated from crops and is contained or treated before being moved through the facility. | ||||
| The effectiveness of the pest management plan is periodically assessed. |
| Biosecurity measure | Y | S | N | NA |
|---|---|---|---|---|
| The Canadian Food Inspection Agency and the provincial/territorial government is contacted when a regulated pest is detected. | ||||
| When a regulated pest is suspected, potential spread is limited by controlling movement of plant material, people and equipment in and out of the infested area. |
2.9 Production Outputs
Production OutputsFootnote 17
Target outcomes:
- Finished product leaving the place of production is free of pests of concern.
- Production wastes are managed, treated and disposed of to reduce the risk of spreading pests.
Benefits: Pest-free products are more valuable to your customers, while managing waste products reduces risks of pest re-infestation.
Risks: If outputs such as finished products and production wastes are not managed, the risk of pest introduction and spread within a facility to neighbouring places of production or to areas where the product may be received (both domestic and international) is increased. Implementing biosecurity measures helps ensure that finished material is free from pests of concern, particularly regulated pests, and allows you to sell healthy, high-quality products that meets a more uniform quality standard. This reduces customer complaints, aids in the maintenance of current markets and facilitates access to new markets.
Guidelines
- Finished product
- Implement a record-keeping system that allows traceback of production outputs in the event of a pest detection once the product has left the facility. The system may be based on labelling, shipping records, production records, invoices, etc.
- Quality assurance is an important consideration for production outputs. Inspect final product leaving the facility for pests of concern and maintain records of these inspections. Performing inspections of finished material in conjunction with routine inspections of growing product ensures the best chance of pest detection.
- Wherever possible, maintain separation between finished material and products at other stages of production. This will maintain the integrity of finished product and prevent transfer of pest problems to future product.
- Waste material
- Contain infested material during removal in an appropriate manner based on the pest's pathway of transmission (e.g. sealed bags to contain flying insects) and avoid transporting infested material through production areas.
- Choose an appropriate disposal method for infested material based on the pest's pathway of transmission (e.g. for pests spread by wind, dispose of by deep burial or transport off-site to a municipal landfill).
- Locate compost and waste piles away from production areas. Make sure waste receptacles such as dumpsters located near the production facility are emptied frequently; the frequency may need to be increased in times of pest infestation.
Based on the above guidelines:
1. Does your facility have a routine procedure for inspecting finished product prior to shipping?
![]()
![]()
2. How can your inspection and disposal practices be improved to reduce pest risks at your facility?
![]()
![]()
Self-assessment checklist
Complete the following checklist to assess existing biosecurity practices at your facility and identify new biosecurity measures that should be incorporated into your biosecurity protocols. Indicate with a checkmark which of the following applies for each measure:
- Yes: Biosecurity measure is currently implemented and does not require further action.
- Sometimes: Biosecurity measure is not always successfully implemented and may require additional action.
- No: Biosecurity measure is not implemented and requires action.
- Not applicable (NA): Biosecurity measure does not apply to your facility and no action is required.
Biosecurity measures: Production Outputs
| Biosecurity measure | Y | S | N | NA |
|---|---|---|---|---|
| A record-keeping system is in place that allows traceback of outputs. | ||||
| Final product is inspected before leaving the facility for pests of concern. | ||||
| Records of final product inspections are maintained. | ||||
| Finished material is kept separate from products at other stages of production. |
| Biosecurity measure | Y | S | N | NA |
|---|---|---|---|---|
| Infested material is contained during removal in an appropriate manner based on the pest's pathway of transmission. | ||||
| Infested material being disposed of is not transported through production areas, whenever possible. | ||||
| An appropriate disposal method is used for infested material based on the pest's pathway of transmission. | ||||
| Compost piles and waste piles are located away from production areas. | ||||
| Waste receptacles (e.g. dumpsters) are emptied in a timely manner, particularly during times of pest infestation. |
3.0 Conclusion
Biosecurity is best achieved when all the foundations and their components are in place and are being managed properly. Weak building blocks or poorly implemented biosecurity practices and measures provide a route by which pests can be introduced or remain undetected and uncontrolled within a facility.
Through careful consideration and application of the biosecurity practices and measures outlined in this Guide, the foundation of a successful biosecurity plan can be established. Further refinement through a cyclical pattern of assessing results and adjusting your biosecurity plan will ensure an approach that is tailored to your facility and maximize the benefits that may be obtained.
By ensuring the application of good biosecurity principles in your facility, many tangible benefits may be realized, including fewer losses and better product, less reactive and often less costly approaches to pest management, and better access to export markets. Further, given the interconnected nature of the floriculture industry, you will be aiding in the improvement of biosecurity standards across Canada and supporting the stability of the sector as a whole.
Appendix 1: Example of Pest Identification Signage
Courtesy of Michael MacLeod
Courtesy of Michael MacLeod
Appendix 2: Example of a Sign Used to Control Access to High-Risk Areas
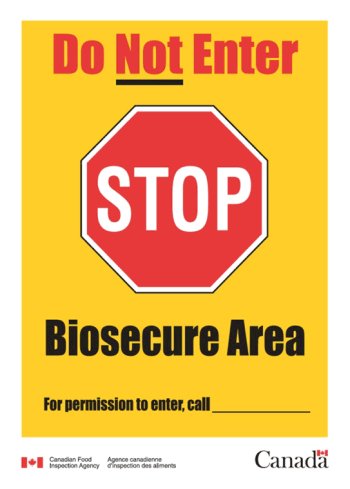
Description for photo - Example of a Sign Used to Control Access to High-Risk Areas
A yellow biosecurity sign that has a picture of a stop sign in the middle. Above the stop sign, there is the statement "Do Not Enter". The word "Not" is underlined. Below the stop sign, there is the statement: "Biosecure Area. For permission to enter, call". There is a line provided to write a phone number. In the bottom left corner, there is the Canadian Food Inspection Agency's corporate signature (a Canadian flag and the name of the Agency in English and French). In the bottom right corner, there is the Canada wordmark (the word Canada with a small Canadian flag above the last "a").
Appendix 3: Example of a Pest Fact Sheet for Thrips
Thrips Fact Sheet
Identification
Order: Thysanoptera
Family: Thripidae
Pest species include:
Western Flower Thrips (WFT) – Frankliniella occidentalis
Eastern Flower Thrips – Frankliniella tritici
Onion Thrips – Thrips tabaci
Greenhouse Thrips – Heliothrips haemorrhoidalis
Banded Greenhouse Thrips – Hercinothrips femoralis
Palm Thrips – Parthenothrips dracaenae
Cuban Laurel Thrips – Gynaikothrips ficorum
Life Cycle
Eggs are laid in plant tissue. There are two larval stages (Fig. 1) and two non-feeding stages, the pre-pupa and pupa (Fig. 2), and the adult stage (Fig. 3). Larvae feed on the underside of leaves. The second instar larva drops to the soil to form the pre-pupa and then the pupa. Adults emerge to feed on leaf, bud, fruit, and flowers, depending on species. Most species have males and females; however, the Onion Thrips is parthenogenetic (does not require mating to reproduce). Thrips prefer drier conditions such as along walkways and row ends.
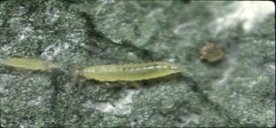
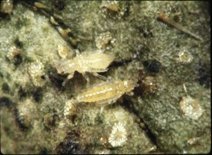
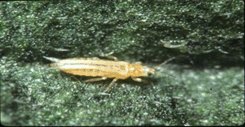
Damage
The larvae and adults have "punch and suck" mouthparts that pierce the cell wall and remove the cell contents. The thrips will feed on several cells in a patch before moving to another part of the plant (Fig. 4). They leave behind particle or oily frass, depending on species. Feeding damage results in cell death. In actively growing tissues the killed cells results in deformed growth patterns in leaves, flowers and fruit.
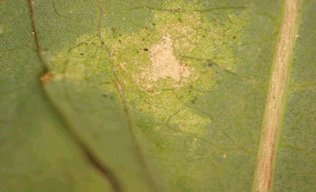
Monitoring
Larvae: Examine the undersurface of leaves.
Adults: Examine the underside of leaves, flowers (Fig. 5) and fruit, "tapping" a plant over a white sheet of paper, yellow or blue sticky cards in or just above the plant canopy, or trap plants.

Management
Thrips are very difficult to manage and require constant attention.
Prevention: Install insect screening on vents, quarantine and inspect incoming plant material, dip cuttings with an entomopathogenic fungus where permitted by the label, and pre-emptively release biological control agents.
Reaction: Routinely monitor to determine the number of thrips in the crop so that pesticide sprays can be conducted if the population exceeds the economic threshold or to determine if biological control agents or the pesticide applications have been effective. Trap plants such as yellow marigolds can actively draw thrips out of the crop. Sticky tape can be strung throughout the crop to capture flying adults. Overhead irrigation or water sprays can be used to dislodge thrips from plants.
All images copyright Olds College
Appendix 4: Example of a Pest Fact Sheet for Aphids
Aphid Fact Sheet
Identification
Order: Hemiptera
Family: Aphididae
Pest species include:
Green Peach Aphid (GPA) – Myzus persicae
Melon Aphid – Aphis gossypii
Potato Aphid – Macrosiphum euphorbiae
Foxglove Aphid – Aulacorthum solani
Life Cycle
Aphids are parthenogenetic: they reproduce without mating during the summer months or year-round when in the greenhouse. Adults give birth to live young. There are usually four nymphal stages (Fig. 1) and a wingless (Fig. 1) or winged (Fig. 2) adult stage. Winged generations are produced in response to overcrowding, poor food quality or declining light and heat. Aphids prefer humid conditions, especially deep in the canopy of the crop.
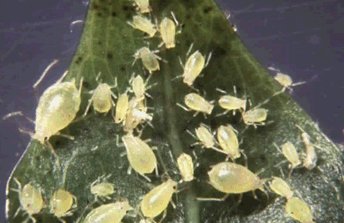
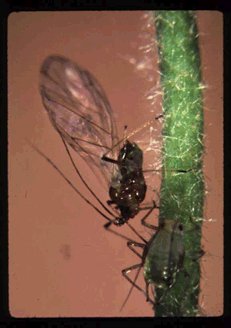
Damage
Aphids pierce and suck plant fluid, resulting in a yellowing of the foliage. Their excrement, known as "honeydew" (Fig. 3), is produced in large quantities and appears as a shiny and sticky substance on leaf surfaces. Black sooty mould can grow on the honeydew. Large populations of aphids can deadhead a plant if they feed at growing points.
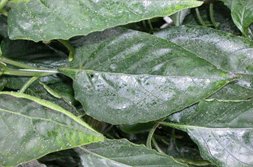
Monitoring
Nymphs and adults: Frequently examine undersides of leaves and stems of plants.
Winged adults: Yellow sticky cards placed at crop canopy.
Management
Aphids are soft-bodied insects vulnerable to water sprays, insecticidal soaps, and systemic and foliar-applied insecticides. A wide variety of parasitoids and predators are available for biological control. Populations need to be suppressed as soon as they are detected because their reproductive rate is so high, populations can explode in just a few days. Remove weeds in and surrounding the greenhouse. Coarse screening on vents will prevent entry into the greenhouse.
All images copyright Olds College
Appendix 5: Additional Resources
General Resources
Field Grown Cut Flowers. British Columbia Ministry of Agriculture. 2015.
Floriculture Production Guide. British Columbia Ministry of Agriculture. 2009.
Greenhouse Floriculture. British Columbia Ministry of Agriculture.
Horticulture Videos. Ontario Ministry of Agriculture, Food and Rural Affairs. 2015.
Publication 370, Agdex 290: Guide to Greenhouse Floriculture Production. Ontario Ministry of Agriculture, Food and Rural Affairs. 2003.
Location and Layout
Commercial Floriculture Grower – Getting Started. British Columbia Ministry of Agriculture. 2015
Screening of Greenhouses for Insect Exclusion. Ontario Ministry of Agriculture, Food and Rural Affairs. 2008.
Maintenance
Publication 75: Guide to Weed Control 2016-2017. Ontario Ministry of Agriculture, Food and Rural Affairs. 2016.
Production Inputs
Grower Guide: Quality Assurance of Biocontrol Products. R. Buitenhuis, Vineland Research and Innovation Centre. 2014.
Irrigation Water Quality for B.C. Greenhouses. British Columbia Ministry of Agriculture. 2015.
On-site Testing of Growing Media and Irrigation Water. British Columbia Ministry of Agriculture. 2015.
Plant Health
Ball RedBook: Crop Production. Ed. J. Nau. 2011. Ball Publishing.
Importance of Aeration in Container Media. British Columbia Ministry of Agriculture. 2015.
Understanding Humidity Control in Greenhouses. British Columbia Ministry of Agriculture. 2015.
Integrated Pest Management
Controlling Slugs and Snails in the Greenhouse. Ontario Ministry of Agriculture, Food and Rural Affairs. 2014.
FactSheet: Aphids in Greenhouse Crops. Ontario Ministry of Agriculture, Food and Rural Affairs. 2009.
FactSheet: Fungus Gnats and Shoreflies in Greenhouse Crops. Ontario Ministry of Agriculture, Food and Rural Affairs. 2014.
FactSheet: Japanese Beetles in Nurseries and Turf. Ontario Ministry of Agriculture, Food and Rural Affairs.
FactSheet: Mite Pests in Greenhouse Crops: Description, Biology and Management. Ontario Ministry of Agriculture, Food and Rural Affairs. 2014.
FactSheet: Thrips in Greenhouse Crops – Biology, Damage and Management. Ontario Ministry of Agriculture, Food and Rural Affairs. 2014.
FactSheet: Whiteflies in Greenhouse Crops – Biology, Damage and Management. Ontario Ministry of Agriculture, Food and Rural Affairs. 2014.
Fungicide Resistance Action Committee (FRAC)
Herbicide Resistance Action Committee (HRAC)
Insect and Mite Pests of Floriculture Crops: Identification Guide. M.A. Bertone, S. Frank, B. Whipker. North Carolina State University. 2016.
Insecticide Resistance Action Committee (IRAC)
Integrated Pest Management. British Columbia Ministry of Agriculture
University of Guelph: Agriculture and Food Laboratory Services
Appendix 6: Acknowledgments
Canadian Ornamental Horticulture Alliance
Flowers Canada (Ontario) Inc.
Flowers Canada Growers
Olds College
Ontario Ministry of Agriculture, Food and Rural Affairs
Perennia
United Floral Holdings Inc.
Westbrook Greenhouses
- Date modified: